Central Park in snow & masking fluid questions answered
Posted: November 6, 2014 Filed under: City lights, Prancers, Skyline, Stamped Landscapes, Tutorial | Tags: Fabriano Watercolour Paper, Penny Black stamps 16 Comments
Last week I posted a very snowy card and received several questions about using masking fluid. I decided to make a short video showing my set up for flicking masking fluid. Masking fluid isn’t just for flicking, of course, but you could be excused for thinking that when you see how rarely I do anything else with it!
I included the card above because it shows snow created after flicking a generous amount of masking fluid on a piece of watercolour paper. It is actually the piece I flicked in the video. I painted over the masking fluid with a blue and a pink distress stain (listed below) and then while the paper was still damp stamped the Skyline stamp in grey a few times then blue. I once again used the little tree from the Prancers set in the foreground. I cut the large sentiment from Yuletide Greetings into two pieces and stamped the front and the inside of the card.

Some answers to your questions about masking fluid
What is masking fluid?
A non-staining liquid composed of rubber latex for masking areas of work needing protection when colour is applied over the top
What type do you use?
Winsor & Newton non permanent masking fluid with a slight yellow tint. The yellow tint makes it easier to see where it has been applied. This is probably more useful when carefully painting the masking fluid onto a project rather than flicking it with careless abandon!
Are all brands the same?
I have used the Winsor & Newton brand for years and cannot comment on other brands. I think the key is to make sure you buy non permanent because you want to remove it after all your stamping/sponging/painting is completed.
Where do I find masking fluid?
Masking fluid is an art supply often used by watercolour artsists so you can find it in art supply stores, usually with the watercolour supplies.
How do you remove masking fluid without ripping the paper?
I must admit I haven’t had too many instances of masking fluid ripping my paper. The spots from splattering are small and rub off very easily. Sometimes with larger dots or sections it is harder to remove the masking fluid. If you are painting a larger area do a test on your paper first to make sure you can remove the masking fluid successfully. I always use my fingers to rub it off but you can use a clean soft eraser.
The video I have created shows how I splatter panels for projects such as the one above. Hopefully some of your questions will be answered once you have watched my process.
Supplies:
Stamps: City Lights, Prancers, Season’s Wishes (PB)
Inks: Memento Nautical Blue, London Fog, Northern Pine (Imagine Craft/Tsukineko) Victorian Velvet, Broken China distress stains(Ranger)
Cardstock: Neenah Solar White 110lb cardstock, Fabriano 100% cotton hot-pressed watercolour paper, textured blue cardstock, textured green cardstock, linen textured paper
Also: Winsor & Newton masking fluid, Kemper Spatter brush
Masking Fluid Christmas Collage 2
Posted: December 22, 2012 Filed under: Background Stamps, Before the Snow, Collage cards, Stamped Landscapes 13 Comments
Here ends a week of Christmas cards made using masking fluid to create falling snow. I really enjoy this technique and I hope you will too when you get a chance to try it out. I would love to see what you create as I’m sure others would too so I have created a link up below where you can share your creations. It will be open for two weeks.
To create this one I stamped music background and winter scroll first, before I placed any masks. Then I positioned the first hill mask and sponged the blue and grey sky and added some background trees. I then repositioned the mask to create a snowbank, added a tree, removed the mask, stamped a foreground tree.and added a bit more sponging. I did add a bit of black on the foreground tree for extra definition but I don’t really like it so I wouldn’t bother next time. If that description is a bit rushed check out my tutorial where I go into way more detail.
I hope to post my last few Christmas cards in the next two days and some gingerbread creations too.

Supplies:
Stamps: Letter Background, Winter Scroll, Silent Night, Before the Snow (PB)
Inks: Memento Pistachio,London Fog, Paris Dusk (Tsukineko)
Also: Winsor & Newton Masking Fluid
Masking Fluid & Brayered Sky 2
Posted: December 21, 2012 Filed under: CAS, Penny Black, Pine & Star, Stamped Landscapes 17 Comments
Another snowy scene for you today using masking fluid; I know many of you have purchased masking fluid and are trying it out or waiting for a chance to play. I have one more masking fluid card to post tomorrow so I might set up inlinkz so that you can link your cards if you get a chance. I could love to see what you create.
I used a brayer for the sky and applied grey ink from one edge and pink from the other so they would blend in the middle. I sponged the snow banks in both pink and grey.
To see why I keep creating snow scenes check out the photos below taken when I looked out my windows this morning.
Supplies:
Stamps: Pine & Star, Silent Night(PB)
Inks: Memento Angel Pink, London Fog(Tsukineko)
Also: Winsor & Newton Masking Fluid
This morning I woke up to this out my back door:

and this out my front door:

Masking Fluid & Christmas Baubles
Posted: December 20, 2012 Filed under: Background Stamps, CAS, Collage cards, Hanging Treasures, Penny Black 14 Comments
Look no trees in this card!
I used the same technique as I used for the Snow Storm Collage card over a base of flicked masking fluid. Several readers have looked for masking fluid with varied success. The one I am using is Winsor & Newton masking fluid for watercolour painting.
Edited to add: Several readers have shared that the masking fluid is available at Hobby Lobby, Michaels, Dick Blick, Jerry’s Artorama, I have bought it at both Michaels and Wallacks art supply. One thing to look for when you buy is that it is for watercolour painting, another is that it is not permanent. I prefer to have a little colour in it so I can see where it is, so I would not go for the colourless one. Mine ends up looking a creamy colour but I have used one that is bright orange also.
That’s all for today; thank you for visiting and thank you for all the encouragement, I love reading your comments.
Supplies:
Stamps: Letter Background , Hanging Treasures,Winter Scroll (Penny Black)
Inks: Sweet plum, Paris Dusk (Tsukineko)
Also: Winsor & Newton Masking Fluid
Masking Fluid & Brayered Sky
Posted: December 18, 2012 Filed under: CAS, Penny Black, Stamped Landscapes, Winter Ledge 7 Comments
Following on from the tutorial I posted yesterday, today’s card features masking fluid to create falling snow but with a brayered sky instead of a sponged sky. With a brayer it is easier to create a uniform colour and coverage than it is with sponging. Usually I want variety and gradation in the sky but I also like to apply the ink with a brayer and create the kind of sky which I occasionally see, bright and beautiful on a winter’s day.
I used two hill masks to create this scene and used sponges on the snow banks where I gradation in the blue shadow. I stamped the winter ledge stamp once before removing the lower mask and then again over the corners of the panel. The masking fluid was applied in the same way as shown in yesterday’s tutorial.
We are expecting 5-10cm of snow tonight so perhaps I will see a scene like this sometime soon.
Supplies:
Stamps: Winter Ledge, Silent Night (PB)
Inks: Memento Summer Sky, Versafine Onyx Black, Versamark(Tsukineko)
Also: Winsor & Newton masking fluid
Masking Fluid Resist tutorial
Posted: June 13, 2012 Filed under: Breezy, Penny Black, Tutorial | Tags: Tutorial 29 Comments
The card above was created using the Masking Fluid Resist method and the Penny Black stamp Breezy. A tutorial outlining the method is featured on Splitcoast Stampers today. Below is the video version of the tutorial, the first video tutorial I have ever done. I almost didn’t make it as the first few attempts were not good. I persevered and my clever 11 year-old son did all the editing. Masking Fluid resist is a method I use for creating snowy scenes usually, but I couldn’t bring myself to create a snowy card in spring!
Bethlehem Skyline
Posted: November 30, 2023 Filed under: Bethlehem skyline, cricut, Echidna Studios, Penny Black, Silent Night | Tags: cricut, Echidna Studios, Minc, Penny Black stamps, sennelier watercolours 9 Comments
Today’s post is another long one full of photos. I hope you enjoy seeing the different styles and techniques applied to the new Echidna Studios digital set ‘Bethlehem Skyline‘. I requested this image and I think my daughter did a beautiful job with her design. The set includes a black silhouette and an outline image featured further down this blog post.

To create these first two cards I printed the silhouette image on white cardstock then foiled over the top with black foil. Using blending brushes I blended first scattered straw distress ink then broken china, and finally uncharted mariner for the deep blue sky. I wanted the colours to blend into each other but I didn’t want too much green where the blue and yellow met so I went carefully in that area.

The sky was dark but I wanted a bit darker so blended just a bit of black soot ink around the edges and top of the panel. You might have noticed the image is the same but a different size in each card; that’s the beauty of a scalable digital image. To add stars to the blended sky I spritzed a fine spray of water on the panel and then dabbed it dry with a paper towel. The stars are subtle but they are there. The words Hope and Peace are once again from the PB ‘holiday snippets’ set.

The next style of card features a cut out of the Bethlehem skyline once again using the digital svg file but cut from black cardstock with the cricut. After cutting the silhouette a couple of times we realised the trees were too small for a card sized cut out so added a tree-less image to the set.

I painted a blue and yellow sky with Sennelier watercolour paints then, once dry splattered white acrylic ink over the blue area. When that was dry I attached the black silhouette and embossed a sentiment from the PB set, ‘silent night’.

When cutting the silhouette from black cardstock I also cut a larger one which I have wrapped around cylindrical glass vase. I put a candle inside the vase and lit it but I am not sure whether the candle is bright enough. I am going to keep experimenting and if I can get a good photo I will share it here on the blog. I think the image would look great cut from vinyl and attached to a wooden panel as a nativity sign. Oh the possibilities!

The final card features the other image in the set, an outline of the Bethlehem skyline. I printed it on hot pressed watercolour paper then painted over the buildings with liquid frisket to mask them. The masking made it possible to paint the sky with wet watercolour layers of blue, pink and yellow while preserving the town to paint after the sky dried. To get the soft bleed of pink and yellow into blue I set the panel upside down on the top edge to dry so gravity helped me get the glowing light effect.

I used a mustard yellow to paint the foreground but it was too bright so I added some of the same blue from the sky to give it some shadow. With both the sky and ground completed I removed the liquid frisket(masking fluid) and painted the buildings with Payne’s grey.

I finished the card with a mat of white then a mat of mustard brown and a little PB sentiment in versafine clair ‘morning mist‘ ink. Thanks for reading this far. I hope you enjoyed my different techniques with this lovely image. I think you’ll be seeing it again; its a new fave!
Today’s post features affiliate links to the following companies. If you buy through these links I receive a small commission at no extra cost to you. The Foiled Fox & Scrap’n’Stamp
Old favourites
Posted: November 10, 2023 Filed under: Berry kissed, Penny Black, Uncategorized | Tags: Fabriano Watercolour Paper, Penny Black stamps, Tsukineko Memento inks 5 Comments
When I say old favourites I am talking in crafting years not harking back to my grandmother’s time. The PB stamp featured on today’s card is definitely a favourite, it’s called ‘berry kissed‘ and it’s been around a few years.

Another old favourite on this card is my often used technique of splattering masking fluid on my hot pressed watercolour paper before stamping or painting. After all the ink is added and dried I remove the masking fluid to reveal little white dots here and there which look like snow.

The final old favourite worth mentioning on this card is the ‘magic’ ink, memento northern pine. It is a dark green dye ink and when it is wet it bleeds into greens, blues and browns. I stamped the leaves with this ink then blended over them with a paintbrush and you can see all the different tones, especially in the close up photo. And yes, the placement of the sentiment does cover a few blotchy berries!
Today’s post features affiliate links to the following companies. If you buy through these links I receive a small commission at no extra cost to you. The Foiled Fox & Scrap’n’Stamp
Cape Wickham Lighthouse
Posted: October 13, 2023 Filed under: cape wickham lighthouse, Echidna Studios, Stamped Landscapes | Tags: Echidna Studios, Fabriano Watercolour Paper, sennelier watercolours 10 Comments
Recently I posted a card featuring a bridge in Oregon and asked if anyone knew or had visited the bridge. It was lovely to hear from people who lived in Oregon or had visited. One person lived very near the bridge. I would love to hear from people who have seen today’s lighthouse, it is quite remote. This image is another Echidna Studios digital stamp and is special to me for several reasons.

The lighthouse is called the Cape Wickham Lighthouse and it is on King Island in Australia. My daughter created the digital design from a photo but it wasn’t one of her photos; she’s never been there. The reference photo is from a slide my dad took in 1963 when our family lived on King Island. I was born there and at age 2 had my photo taken in front of the lighthouse. So you see there is input from three generations of my family in this card!

I printed the digital image on hot pressed watercolour paper, masked the lighthouse with a few strips of painter’s tape then splattered masking fluid over the sky. I painted the sky with Sennelier watercolours and while it was still damp painted removed paint with a damp brush to create the beams of light. Once the sky was dry I removed the tape so I could add some shadow to the lighthouse and paint the grass and hut. I removed the masking fluid to reveal the stars once everything was dry. (now I’m not sure that the Cape Wickham light shines out both ways like that but I used artistic license).
Let me know if you have seen or heard of the Cape Wickham lighthouse; it is the tallest in the Southern Hemisphere!
Good Day Bouquet
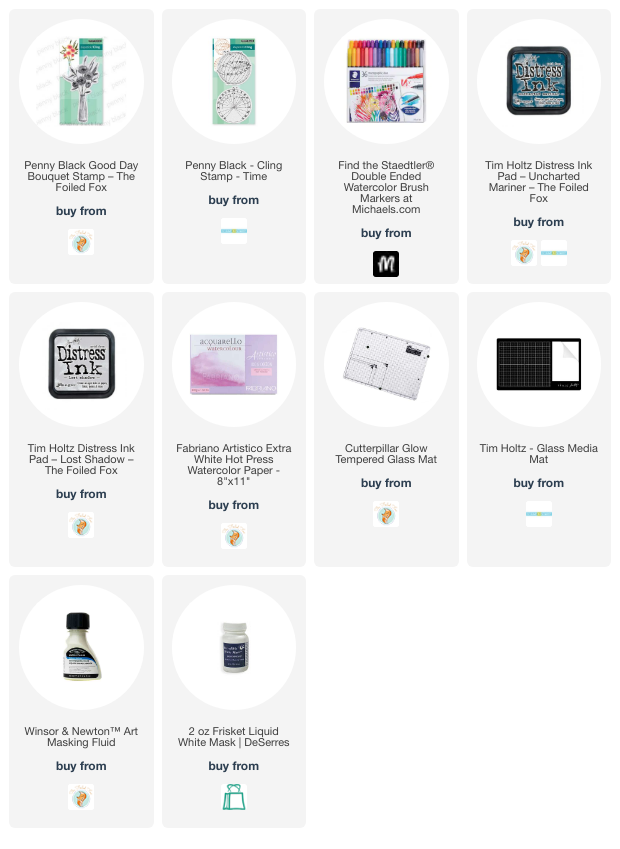
Posted: June 7, 2023 Filed under: good day bouquet, Penny Black, Time | Tags: Fabriano Watercolour Paper, Penny Black stamps, Ranger Distress inks, Staedtler watercolour brush pens 3 Comments
Good day bouquet is a pretty vase stamp from Penny Black. I used a strip of hot pressed watercolour paper and kept the deckled edge which is on the large sheets I buy then cut into smaller pieces for card panels and other projects. I smooshed uncharted mariner and lost shadow distress inks on my glass mat, diluted it with water then swiped the watercolour panel through the ink. There was a fine splatter of masking fluid on the panel which is most noticeable on the side of the vase.
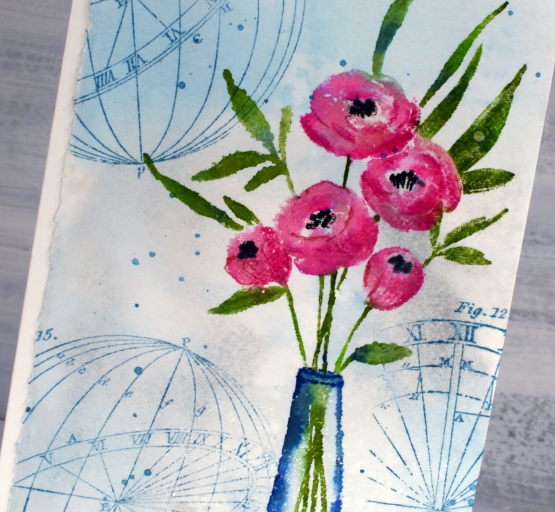
I chose to use water-based brush markers to colour the stamp. As the distress markers are being discontinued I have been testing out alternatives for inking stamps. Water-based markers can be helpful in inking small areas on a stamp. For the flowers, leaves and stems I used Staedtler water-based markers; the pack I bought has 36 colours so I was able to use three different pinks for the flowers and a couple of greens for the stems. I used uncharted mariner for the vase and then later for the ‘time’ stamps I added to the background. When I ink my stamps with markers I spritz the stamp before pressing it onto the panel and sometimes blend the stamped image with water also. I inked the centres of the flowers with black, then after stamping used the small tip end of the black marker to add more detail.

To finish I added some water splatter which I dabbed away with a paper towel and some ink splatter because you know I love to splatter! If you are in Ottawa don’t forget you have the opportunity to pick up some crafty bargains this weekend at the Saturday garage sale, details below.

(Compensated affiliate links from Foiled Fox & Scrap n Stamp)