
Red polka dot purse
Posted: March 5, 2008 Filed under: Designer Paper, Purses, Tutorial 5 Comments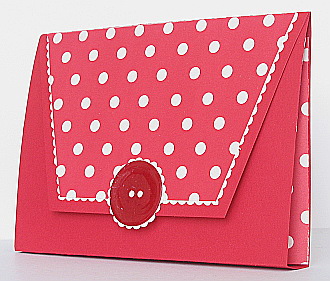
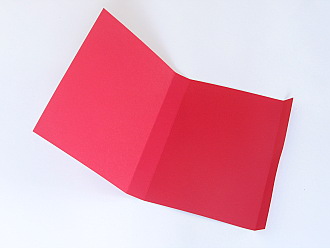
After I had completed my first purse, I set out to make another and create a tutorial as I did it. First I cut a piece of cardstock 10¼” x 6½”. I then scored it at ½”, 5″ and 5¾”as shown below.
To make the purse flap I cut a piece 6½”x 3¾” and measured in 1″ from the corner on both ends of one long side and cut off triangles to make a trapezoid.

I did not measure to make the designer paper shape to decorate the purse flap (sorry), I just made it a little more than ¼” smaller all the way around the three shorter sides. Don’t stick it on yet.
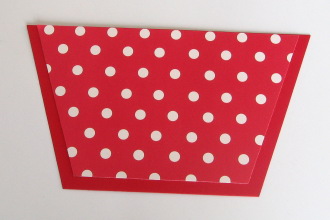
Attach designer paper shape to vanilla cardstock, aligning the longer edge with the edge of the cardstock.

Cut around the designer paper with decorative scissors making a “lace” edge.

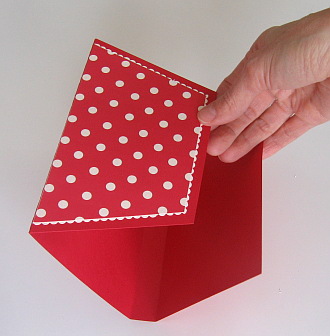
Attach the purse flap to the ½” flap on the purse.
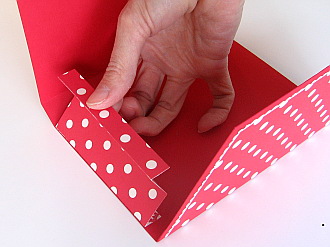
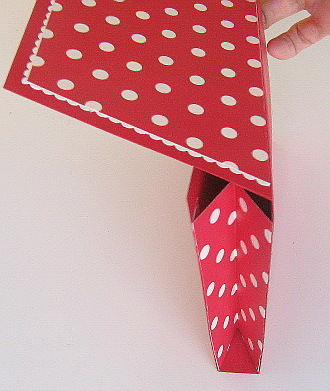
Next I made gusset pieces for the sides of the purse with designer paper. I cut two pieces 4″x 3″ and scored them along the length at ½” 1½” and 2½”. Then I folded them concertina style.
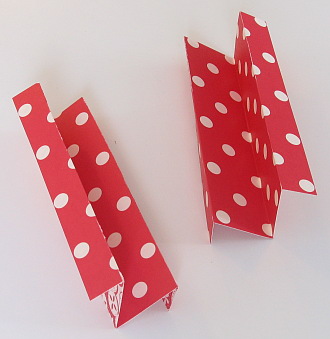
I then glued the narrower section of the concertina piece to the inside of my purse. I think it is easier to just look at the picture than have me try to explain it.
To fasten the purse flap I used a velcro circle and added a big red button with scallop trim to finish it off. The button just happened to end up looking exactly as I wanted even though I wasn’t sure how to make it initially. I punched out a circle of red cardstock and stamped the versamark pad directly onto it. I then embossed with glassy glaze enamel embossing powder, then stamped with versamark and embossed again. When I was heating the second layer I held the heat tool directly over head which pushed liquid enamel out to the sides giving the button a raised edge.


This is so, so darling!!! And I just LOVE how you did the sides — fabulous!!! Thank you so much for taking the time to do this wonderful tutorial!!! A very striking project!!! Thanks so much!!!
What a cute purse! Thank you so much for showing us how to make it. I love the little lace edge. Now maybe I will use those scissors that stay in the drawer.
[…] made this purse a little while ago, it is the same design as my red one and my chocolate one but a little bigger. I will try a different design one of these days. I like […]
Where did you find that polka-dot paper?
The polka dot paper is from the retired “Cerise” set from Stampin’ Up.
Thanks for looking.